hellonow
-
Posts
1766 -
Joined
-
Last visited
-
Days Won
27
Content Type
Profiles
Forums
Gallery
Downloads
Blogs
Events
Everything posted by hellonow
-

Transmission Remote : 403 Forbidden - Too Many Attemps
hellonow replied to KYTECHNGAMING's question in Dev channel issues & test reports
данный вариант настройки доступа будет доступен и в стабильной версии ветки 3.07 -
Transmission Remote : 403 Forbidden - Too Many Attemps
hellonow replied to KYTECHNGAMING's question in Dev channel issues & test reports
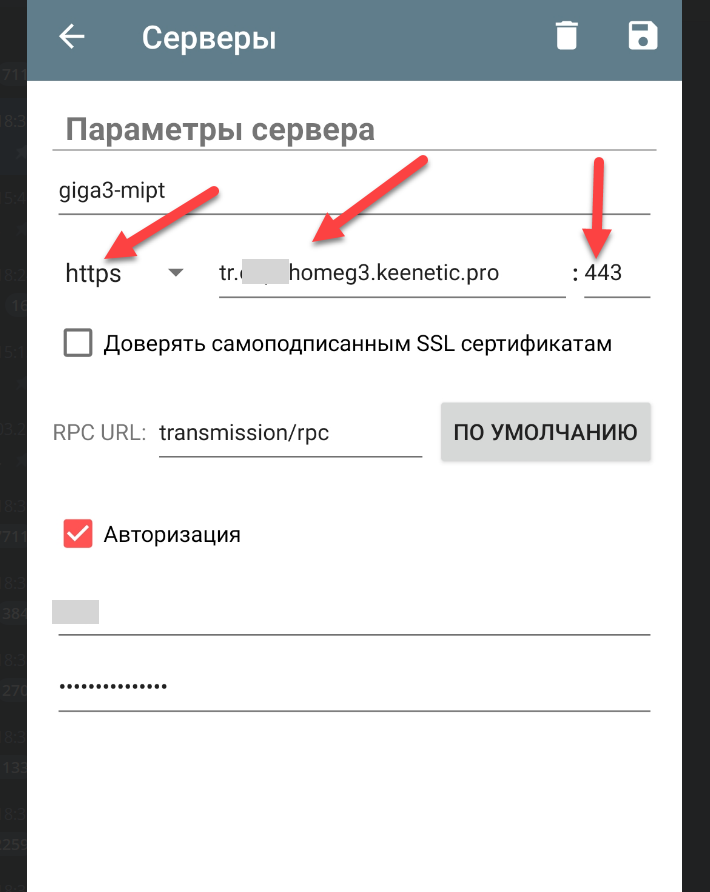
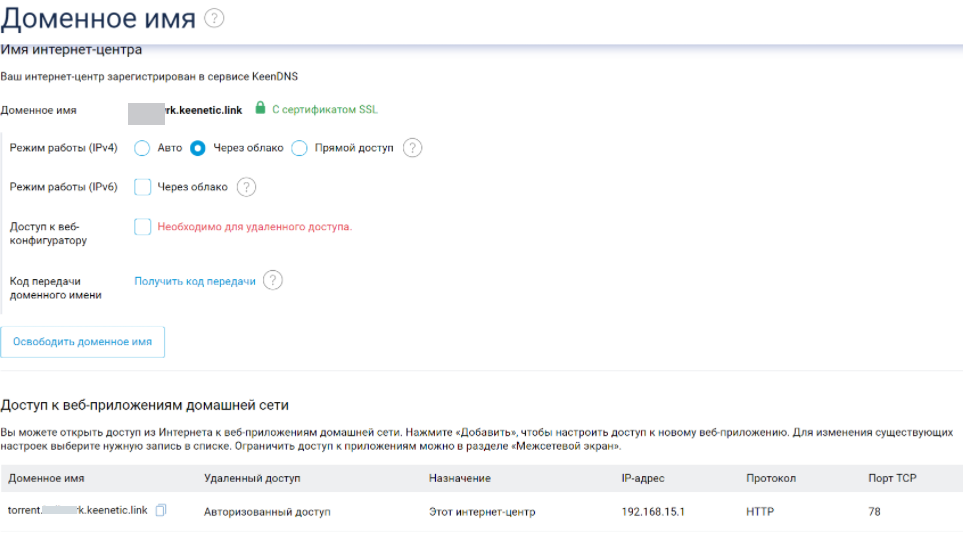
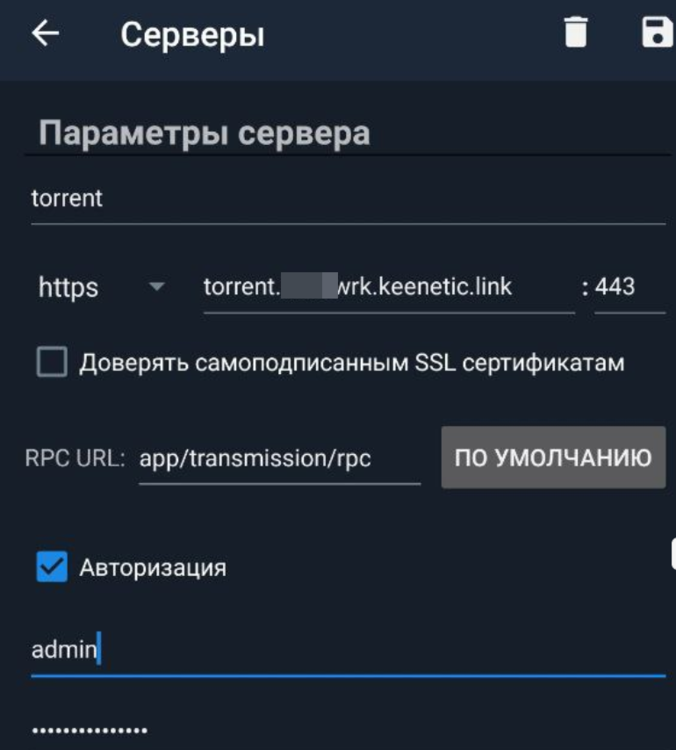
Вариант настройки с учетом нововведения: Версия 3.7 Beta 0.9 (пре-бета): Transmission: включен веб-интерфейс на адресе 127.0.0.1:78 (по просьбе @enterfaza) [NDM-1806] Теперь мы не открываем доступ для торрент-клиента по порту TCP\8090, а также можно не открывать доступ по домену 3го уровня службы KeenDNS. Пример настройки. Делаем настройку домена 4го уровня для торрент-клиента:В CLI: ip http proxy torrent upstream http 127.0.0.1 78 domain ndns security-level public auth exit system configuration save В веб-интерфейсе: После проверяем доступ по домену 4го уровня, указав данный линк, пример:https://torrent.name.keenetic.link/app/transmission/ Пример настройки в Transmission Remote:RPC URL указываем app/transmission/rpc и порт 443 с указанием протокола https.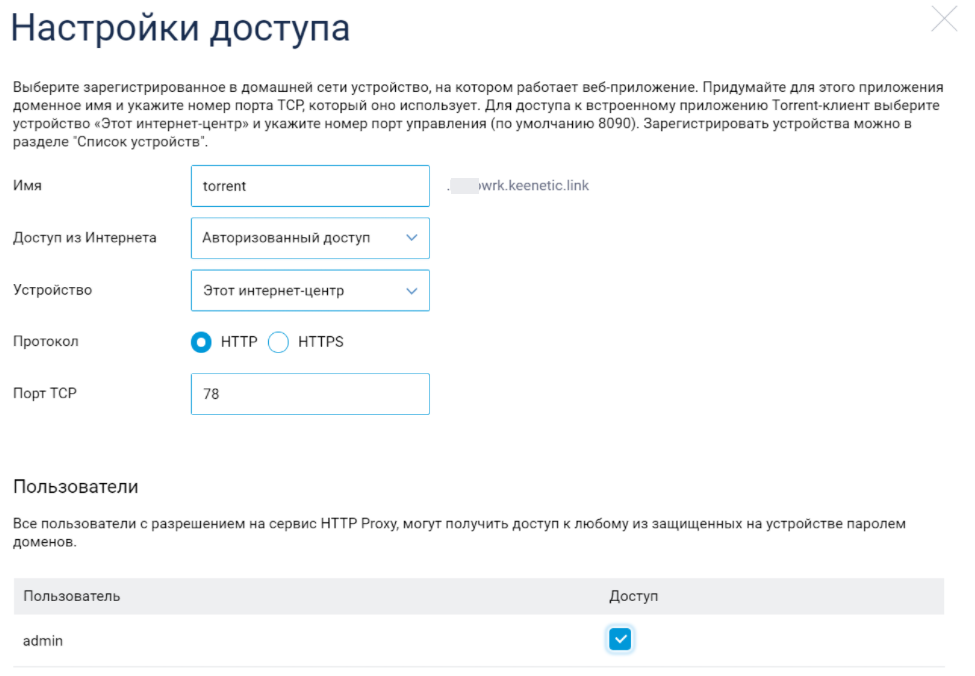
-
Transmission Remote : 403 Forbidden - Too Many Attemps
hellonow replied to KYTECHNGAMING's question in Dev channel issues & test reports
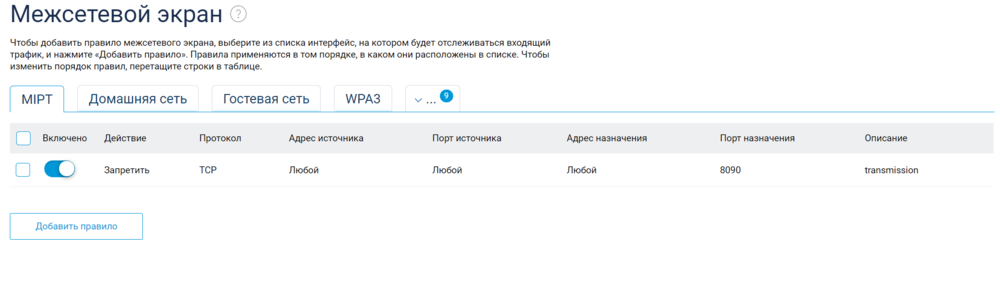
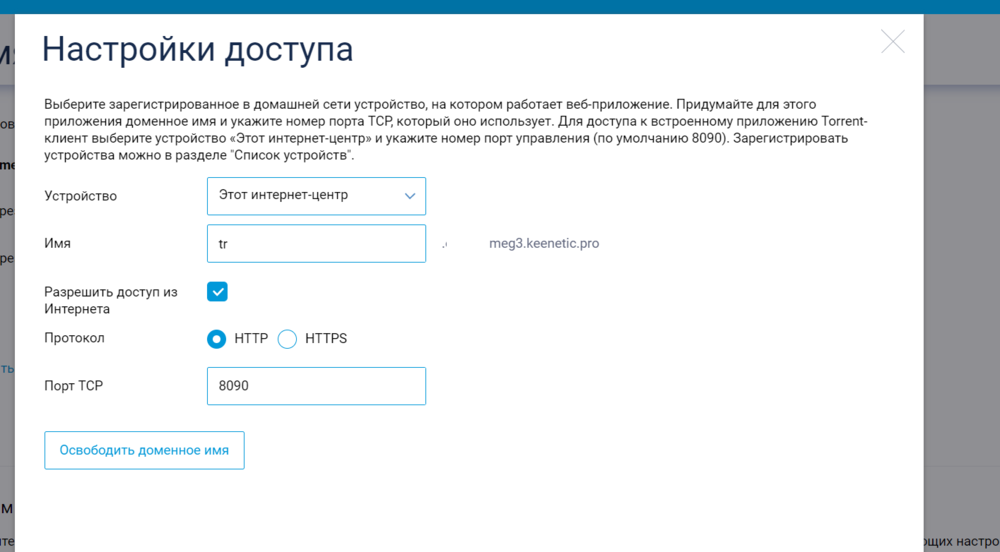
Проблема связана с тем, что по умолчанию TCP\8090 transmission "светит" в интернет и из вне боты могут пытаться подобрать пароль - брутфорсить.После несколько попыток неудачного подбора пароля, RPC блокирует доступ в веб и пока демон не будет перезапущен, доступ не появится.В будущих версиях планируется исправления данной проблемы.На счет TCP\8090, сейчас его можно зафильтровать в межсетевом экране на интерфейсе, через который вы выходите в интернет.Пример:Добавьте запрещающее правило для TCP\8090: И чтобы управлять загрузками через Transmission Remote, потребуется настроить домен 4го уровня: В настройках сервера на стороне Remote указываете: Получаете защищенный, зашифрованный доступ в RPC торрент-клиента. ------ @yerebakan Add a firewall rule for TCP\8090 in CLI, example: access-list _WEBADMIN_ISP deny tcp 0.0.0.0 0.0.0.0 0.0.0.0 0.0.0.0 port eq 8090 deny description transmission exit system configuration save Use the setting to access in the Transmission Remote - https://help.keenetic.com/hc/tr/articles/360000563719